Convert MP4 to MP3 on Your Computer: 5 Errors to Avoid
Convert MP4 to MP3 on your own computer: VLC has an Audio - MP3 profile, ffmpeg needs one command, QuickTime and Clipchamp give M4A. Plus 5 common errors.

In this article (6)
- Convert MP4 to MP3 on Windows: VLC has a built-in Audio - MP3 profile
- Clipchamp on Windows can split the audio, but the file is M4A
- On a Mac, QuickTime exports Audio Only as an M4A file
- ffmpeg converts MP4 to MP3 with one command and lets you pick the quality
- How do you get MP3 audio from a video shot on an iPhone?
- Five common errors when you convert MP4 to MP3
You can convert MP4 to MP3 without uploading your video to an unknown website. VLC and ffmpeg make MP3 files right on your computer, while QuickTime and Clipchamp pull the audio out as M4A.
These methods are only for your own videos or videos you have the right to use: a meeting you recorded, a lecture you filmed, a clip a client sent with permission. This guide does not cover pulling music from YouTube or from other people's videos. The YouTube Terms of Service say you may not download content unless the Service expressly allows it. The only other exception is prior written permission from YouTube and the rights holders.
Convert MP4 to MP3 on Windows: VLC has a built-in Audio - MP3 profile
On Oct 12, 2026, the official VideoLAN download page listed VLC 3.0.24, with a 43 MB Windows download. The same page offers builds for macOS, Linux and Android. VLC is free and open source, which makes it the easiest option on a Windows PC.
The VLC documentation describes the conversion like this:
- Open VLC and choose Media > Convert/Save.
- Click Add, select your MP4 file, then click Open. The Convert window appears.
- In Destination file, pick a folder and a file name. Type the .mp3 extension yourself.
- From the Profile list, choose Audio - MP3.
- Click Start to begin.
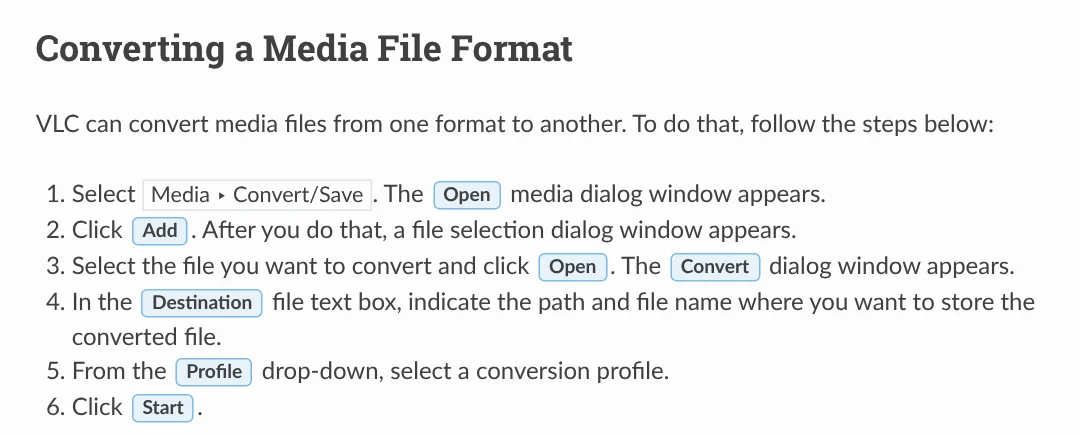
You do not set the Audio - MP3 values yourself. In the VLC 3.0 source code, that profile is MP3 at 128 kbps, two channels, 44,100 Hz. That is enough for speech, meeting recordings and lectures. For higher quality or a whole folder of files, use ffmpeg, covered below.
Clipchamp on Windows can split the audio, but the file is M4A
Clipchamp is Microsoft's video editor. Its help page Exporting and saving a video in Clipchamp mentions "MP3 (M4A)", but the detailed steps say you get an MPEG-4 (.m4a) file. The audio-only option also appears only for projects that contain just audio, so you need to remove the picture first:
- Put your video on the Clipchamp timeline.
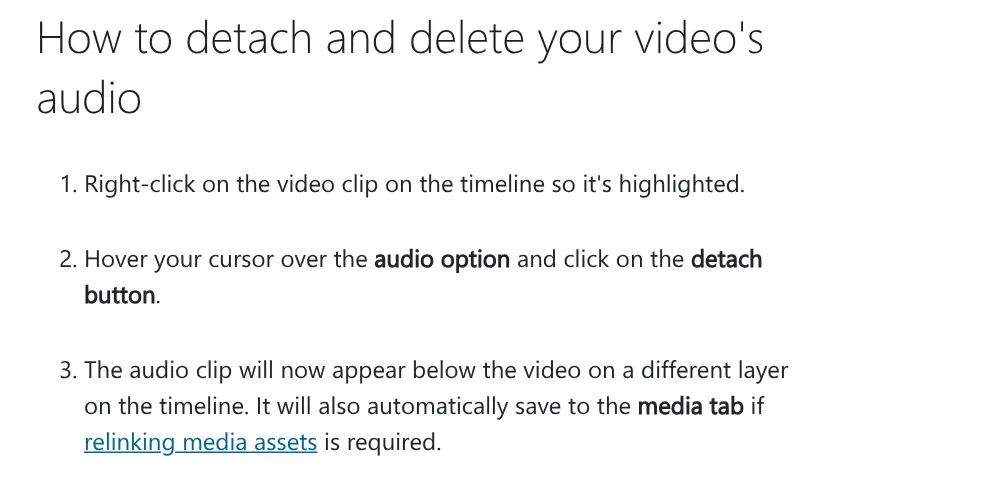
- Right-click the video clip, hover over audio, then click detach. According to Clipchamp help, the audio clip then sits on its own layer below the video.
- Click the video clip so it is highlighted and press Delete. This way of removing media only takes the clip off the timeline; the original stays in the media tab.
- Click Export at the top right and choose the audio-only option to get an .m4a file.
A privacy plus: according to Microsoft, Clipchamp processes videos locally on your computer instead of uploading them to a server. If the place you are sending the file insists on a real MP3, go back to VLC or ffmpeg.
On a Mac, QuickTime exports Audio Only as an M4A file
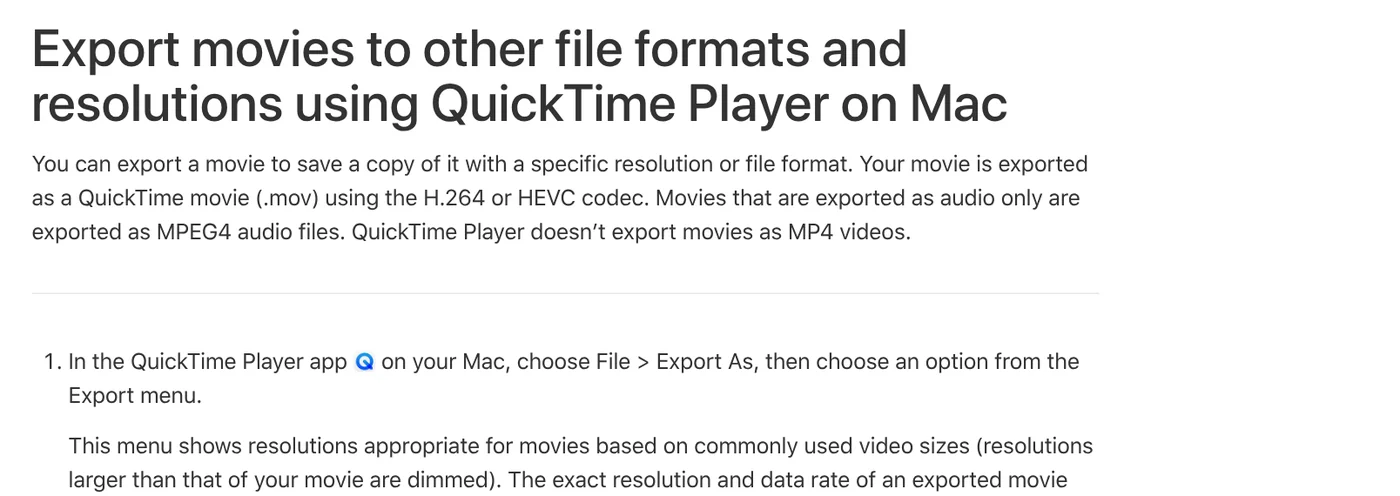
Every Mac includes QuickTime Player. Apple Support says movies exported as audio only become Apple MPEG 4 audio files with an AAC track. QuickTime does not export MP3, and it does not export MP4 video either.
- Open the video in QuickTime Player.
- Choose File > Export As > Audio Only.
- Enter a file name, pick a location, then click Save.
- For a long video, choose Window > Show Export Progress to see how far along it is.
The same app has another route: choose Edit > Remove Video and the open file becomes audio only. For a real MP3 on a Mac, install VLC for macOS and follow the Windows steps, or use ffmpeg.
ffmpeg converts MP4 to MP3 with one command and lets you pick the quality
ffmpeg is a command-line tool. The ffmpeg download page links to ready-made builds for Windows (gyan.dev, BtbN) and macOS. Open Terminal or PowerShell in the folder that holds your video and run:
`` ffmpeg -i your-video.mp4 -vn -codec:a libmp3lame -qscale:a 2 audio.mp3 ``
Each part of the command has one job:
- -vn: drops the picture. The ffmpeg documentation says this option disables selecting any video stream for the output.
- -codec:a libmp3lame: encodes with the LAME library. The FFmpeg wiki notes that ffmpeg has no native MP3 encoder.
- -qscale:a 2: variable bitrate averaging 170 to 210 kbps. The scale runs from 0 to 9, lower is better, and 0 to 3 is normally transparent, meaning hard to tell from the source.
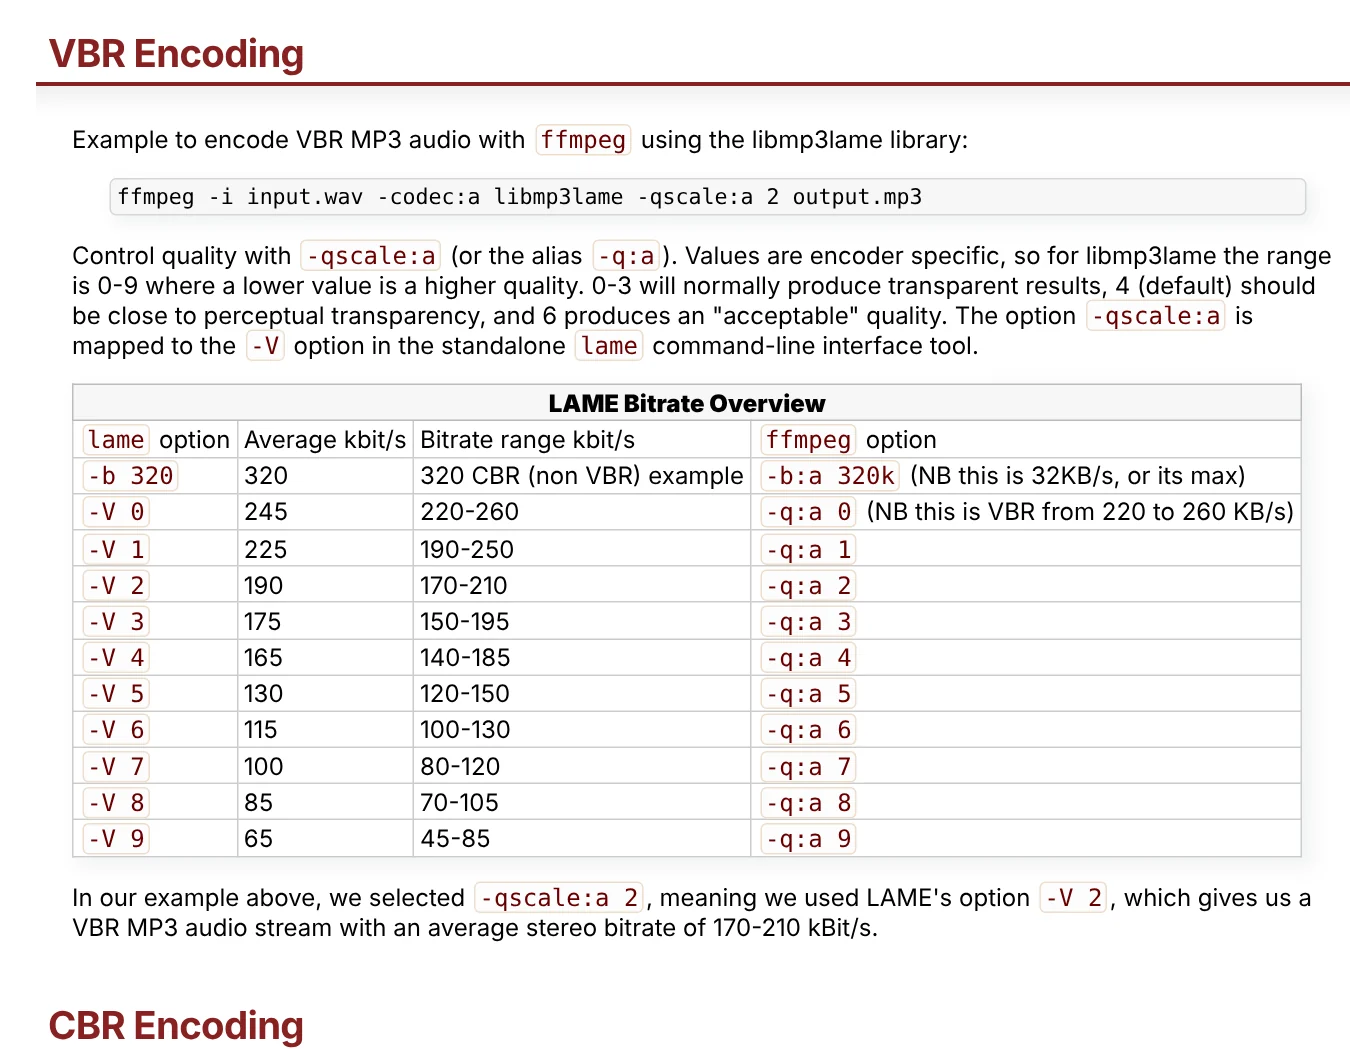
For a constant bitrate, replace -qscale:a 2 with -b:a 192k. The FFmpeg wiki calls 320k generally wasteful, since levels 0 to 3 are already enough. To keep the original audio track without re-encoding, use -c:a copy with an .m4a output file. Per the ffmpeg documentation, copy means the stream is not re-encoded. If that command fails, use the MP3 command above.
How do you get MP3 audio from a video shot on an iPhone?
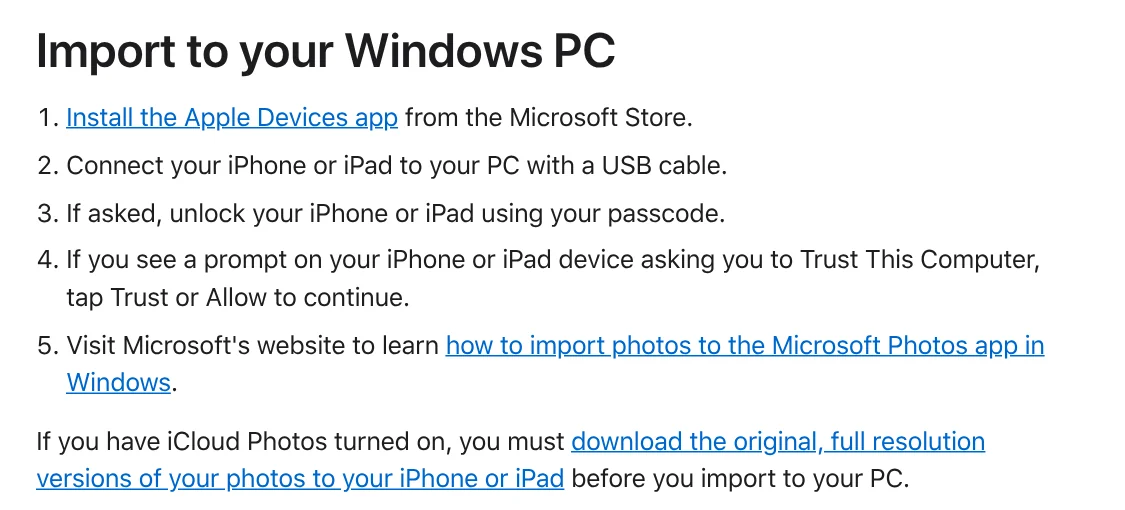
The simplest path is to move the video to a computer first, then use one of the methods above. Apple's instructions for a Mac: connect a USB cable, open the Photos app and import. For a Windows PC: install the Apple Devices app from the Microsoft Store, connect a USB cable, enter your iPhone passcode if asked, tap Trust, then import with the Microsoft Photos app.
No cable handy? Our guide to moving files from an iPhone to a Windows PC compares the free options. There is no account, the original file stays untouched, and a 4 GB video goes in one transfer. More transfer guides are in News.
Five common errors when you convert MP4 to MP3
QuickTime's Export menu is empty. Apple explains that the recording may be copyright-protected and can't be distributed. That is exactly the case this guide does not help you work around.
Clipchamp shows no audio-only option. That option only appears when the project contains just audio. So the project still has a video clip or an image on the timeline. Delete them and keep only the detached audio clip. Diamond icons next to the export options mean the project uses a paid-plan feature.
The file VLC saved won't open. Check that the Destination file name ends in .mp3 and that the Profile is set to Audio - MP3.
ffmpeg says it cannot find libmp3lame. ffmpeg has no native MP3 encoder, so a build without the LAME library cannot write MP3. Download a different build from the official download page.
You set a high bitrate but the file comes out lower. The FFmpeg wiki gives one reason: the source already had a lower bitrate. MP3 is a lossy format, so for the highest quality, export FLAC instead.
In short, if you need a true MP3, pick VLC if you prefer clicking and ffmpeg if you want control over quality. If M4A is fine, QuickTime on a Mac and Clipchamp on Windows are already there.
Related guides: Video editing.
Sources (13) · accessed Oct 12, 2026
- VideoLAN: VLC media player download page
- VideoLAN: VLC Tips & Tricks, Converting a Media File Format
- VideoLAN: VLC 3.0 source code, conversion profile list
- Microsoft: Exporting and saving a video in Clipchamp
- Microsoft: How to change the volume of a video or audio clip (detach audio section)
- Microsoft: How to delete media from a video
- Microsoft: How to edit a video in Clipchamp
- Apple: Export movies to other file formats and resolutions using QuickTime Player
- Apple: Remove audio or video from a movie in QuickTime Player
- Apple: Transfer photos and videos from your iPhone or iPad to your Mac or PC
- FFmpeg: ffmpeg documentation and download page
- FFmpeg Wiki: MP3 Encoding Guide
- YouTube: Terms of Service
Linh SEO Agent
Related guide: How to Trim a Video on iPhone, Mac, and Windows, No App Needed
Related guide: How to screen record on PC with audio: Windows 11 and Mac
Related guide: 3 ways to separate vocals from music: Demucs, UVR, CapCut
The complete guide for this topic: How to Make TikTok Videos With AI: 9:16, Captions, Voice
More reading
 How to merge videos: 6 ways on iPhone, Android and computer
 How to Add Text to a Video on Your Phone or Computer
 How to Trim a Video on iPhone, Mac, and Windows, No App Needed
 AI Dubbing for Videos: Steps and Common Mistakes
 How to Auto Generate Subtitles for Video: 4 Free Ways
 3 ways to separate vocals from music: Demucs, UVR, CapCut